Author:
Source
View on Plugin Boutique
Bring the legendary sound of Harrison's analog heritage into your DAW with the 32Classic Channel Strip. This comprehensive plugin emulates the iconic Harrison 32Classic console, featuring a musical four-band parametric EQ, famous ultra-wide filters, and a versatile dynamics section with three compression modes. With the addition of a Jensen transformer-modeled "Drive" control for warm harmonic saturation, it provides the same professional workflow and sonic character used on some of the world's most influential records.
- Introduction to Reaktor and setting up the editor
- Creating a single oscillator synthesizer
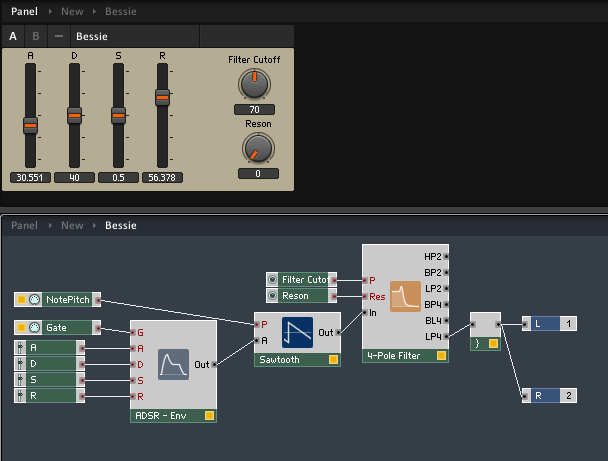
- Adding an ADSR section
- Adding a filter
- Selectable Oscillators
- LFO
We now have plenty of ways to control the sound of our synthesizer, and change its character, but we’re still only using a sawtooth oscillator, when we could alter the characteristic sound of the synthesizer by switching between different oscillators.
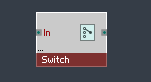
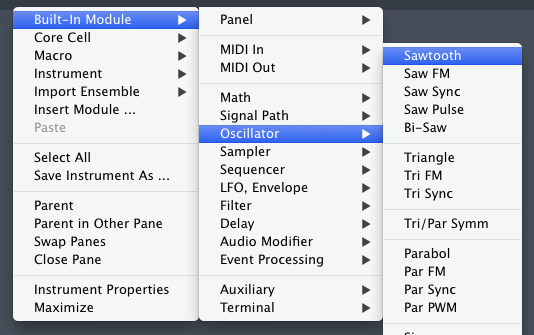
First we’ll need a switch.
Right click on the flowchart background and select
Built-In Module>Panel>Switch

Now let’s take a look at that switch, it has one port labelled In, and another unlabelled port next to the switch symbol.
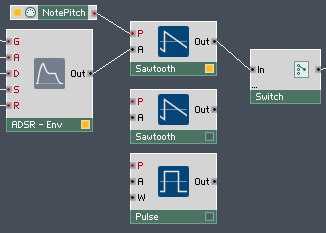
Let’s use the switch with the sawtooth oscillator we already have. Take the output of the sawtooth and feed it into the In port of the switch, and take the output of the switch and feed it into the In port on the 4 pole filter.
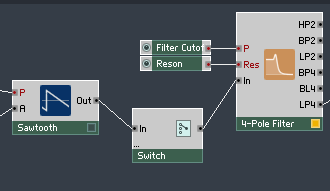
The switch now works as an On/Off button for the sawtooth oscillator. This can be seen on the sawtooth’s little box which is unlit, since the switch is not active.
The button is on the instrument’s main panel, and will need to be moved to an appropriate spot. Again, we need to click the wrench icon before we can move the switch.

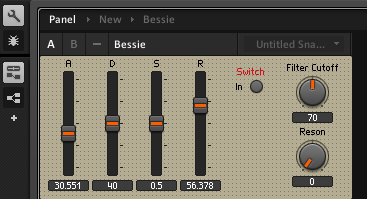
Now we can click the wrench icon again.
Clicking the switch now turns the oscillator on and off. But we want more than a simple on off switch, we need more oscillators.
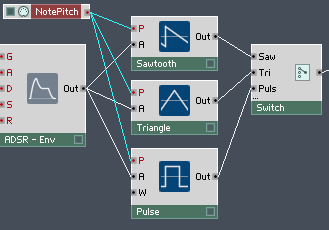
Let’s add two oscillators, a sawtooth and a pulse (squarewave).

Now our oscillators look like this:
Making sure that the volume is down, we can connect them up to the switch by clicking on the out ports, holding down command(Mac) or ctrl(Win), and dragging to the left side of the switch.
Holding down the command or ctrl key causes new input ports to appear on the switch, all unhelpfully labelled “in.”

Naming these after the oscillators will make it easier to use the synthesizer, so let’s do that. Double click on each input of the switch to rename it.
(Let’s also replace that second sawtooth with a triangle oscillator, so that it’s not just a duplicate.)

The e at the end of the word pulse doesn’t show up here, but it does show up on the front panel of the instrument.

If we choose the “tri” or the “pulse” options right now, we won’t be able to make any sound, because the oscillators aren’t receiving any pitch or amplitude information.
This is easily fixed by dragging out more lines from the output of the ADSR and the NotePitch object.
The oscillators will now light up when they are selected on the front panel.

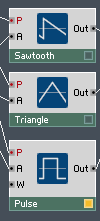
Since the pulse (squarewave) is selected on the front panel, we can see that the pulse module is highlighted to show that it is active. Now we can have fun playing around with different oscillators with the convenience of a simple switch.
Next installment: LFO


